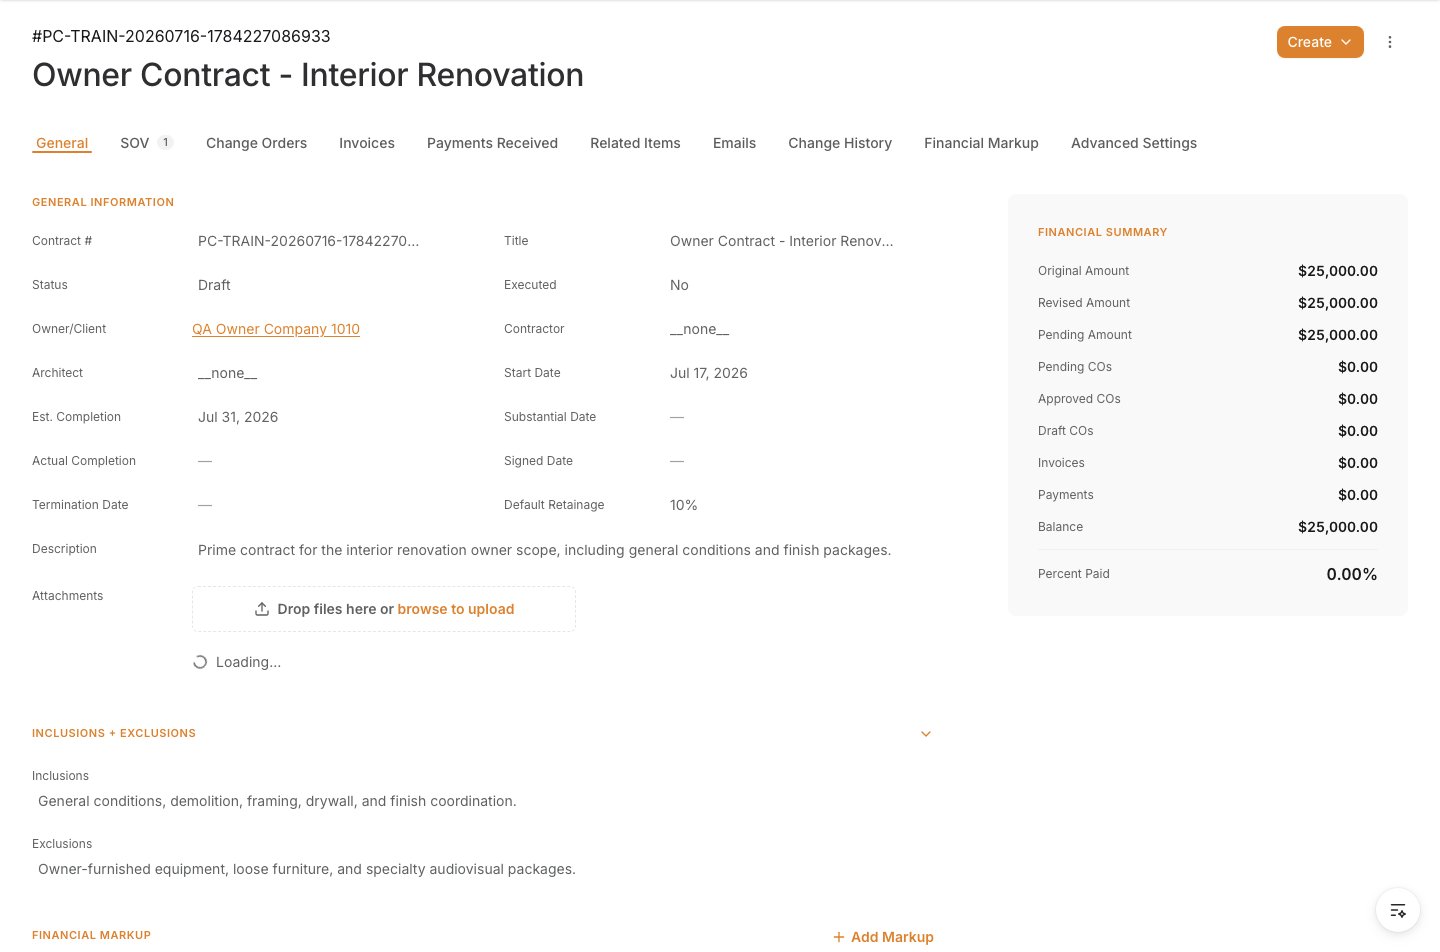
Watch the walkthrough
Create the prime contract
1
Open the Prime Contracts Tool
In the project, open the Prime Contracts Tool from the sidebar or the tools dropdown in the header. Select Create to open the Create Prime Contract form.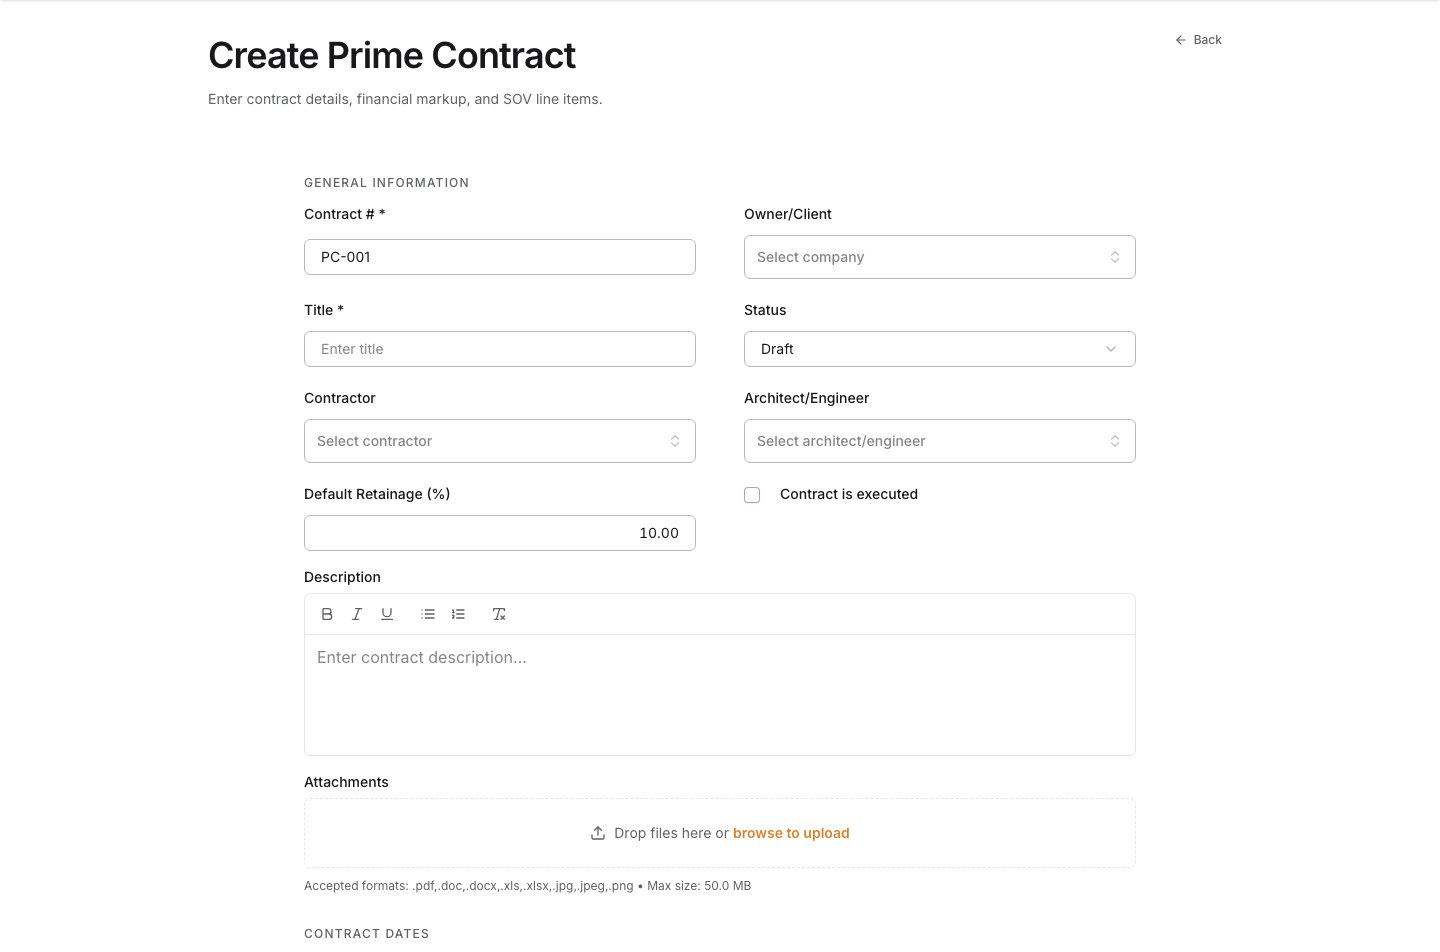
2
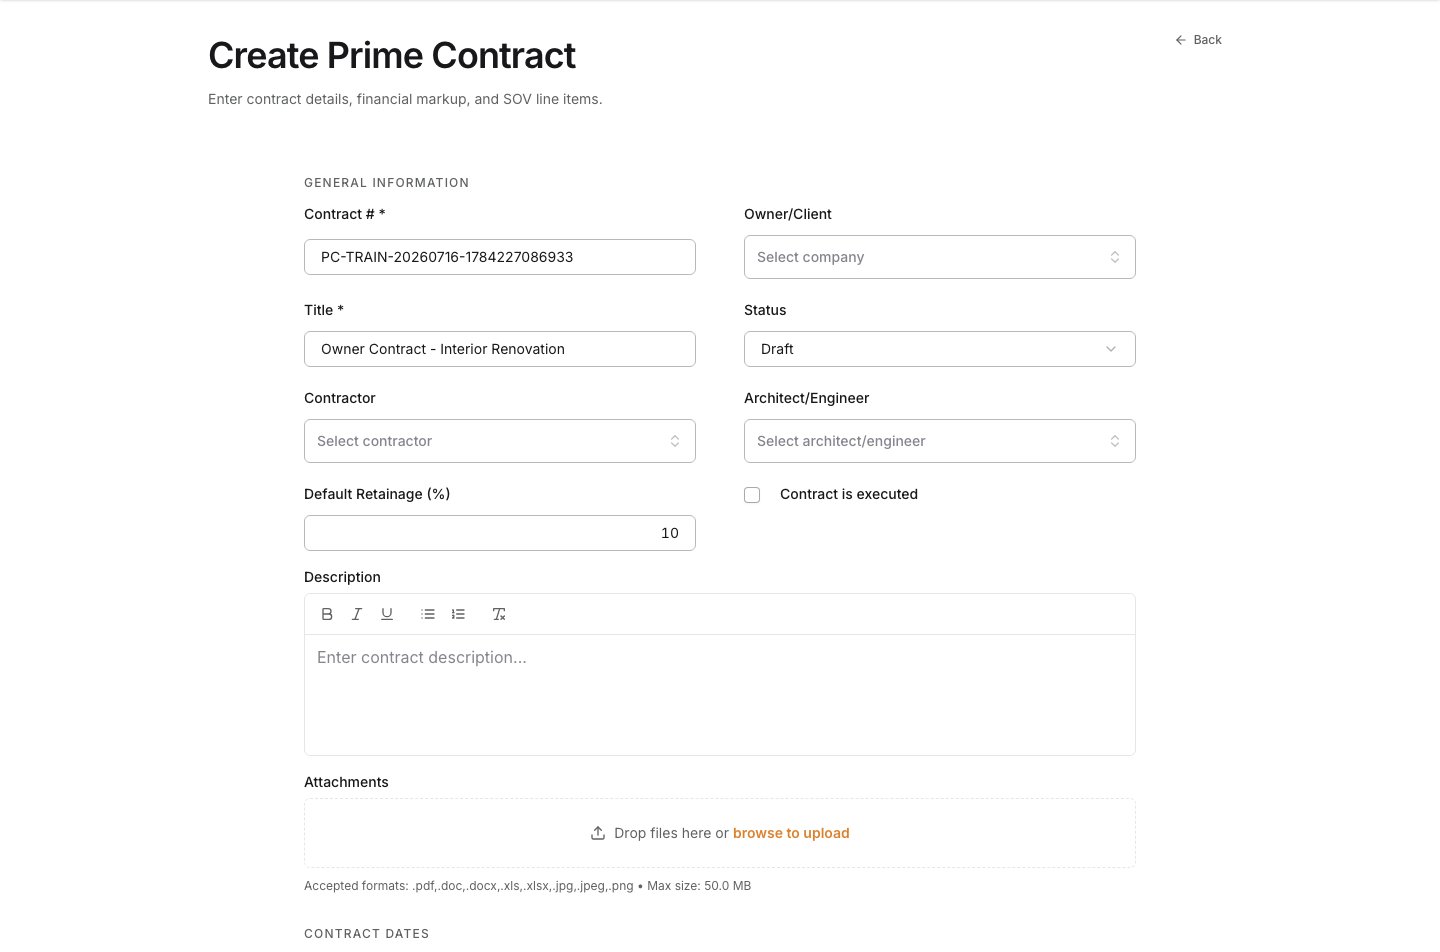
Enter the prime contract number and title information
3
Confirm the Owner, Contractor, and Architect/Engineer.
Click the dropdown to select the Owner/Client. If tghe company has n olt been added contact the accounting department to set up the company credentials. This field is not required to crfeate the contract and can be edited later.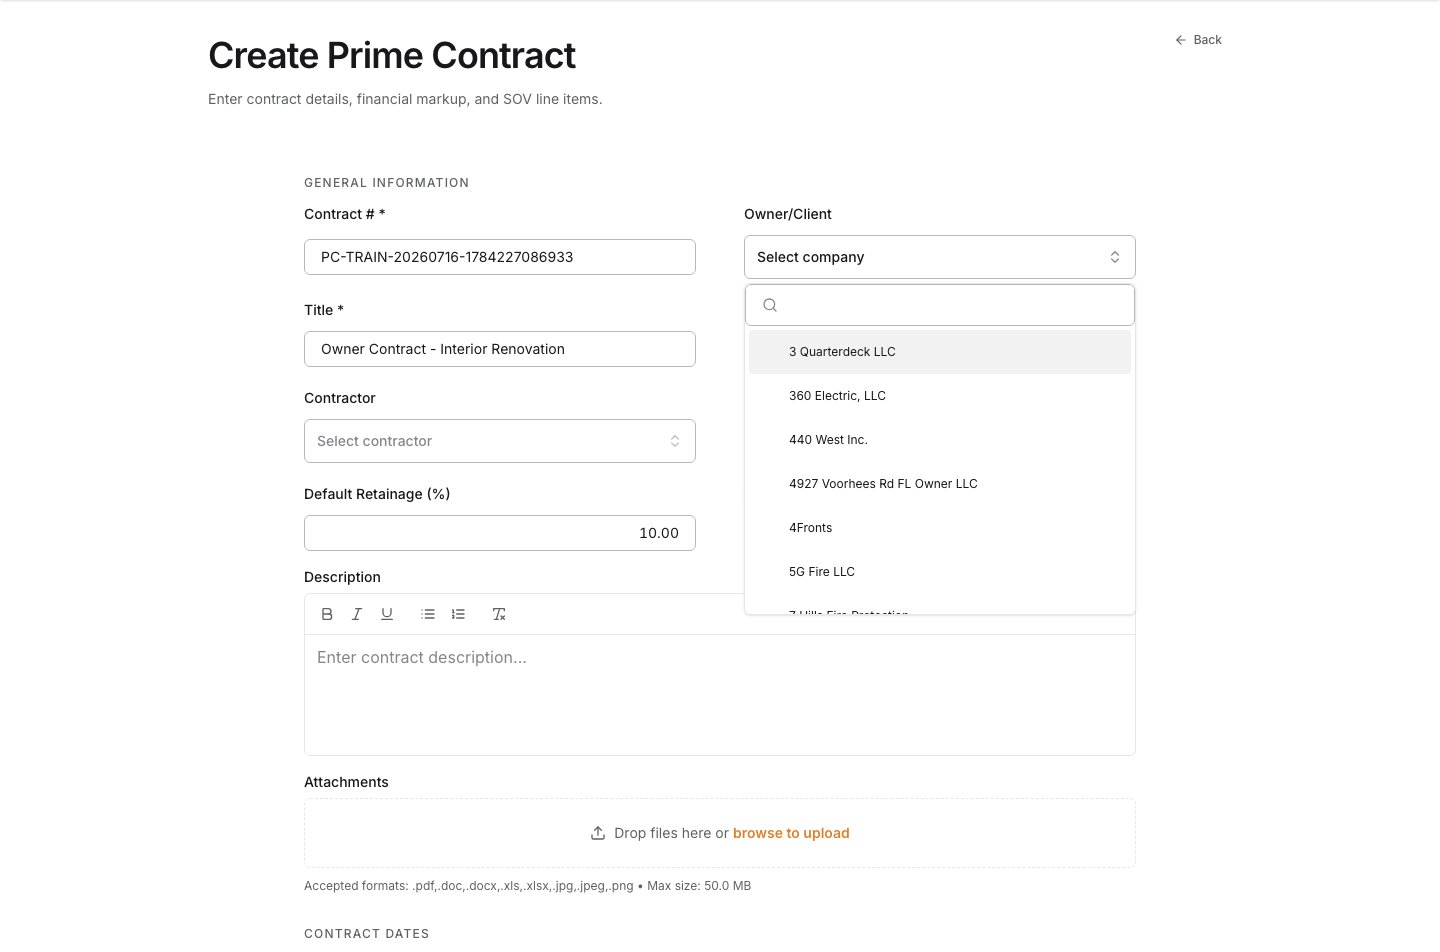
4
Confirm the status
Open Status to review the available lifecycle states. Use Draft while the SOV or supporting information is still under review. Move the agreement forward only when it is ready for your approval and billing controls.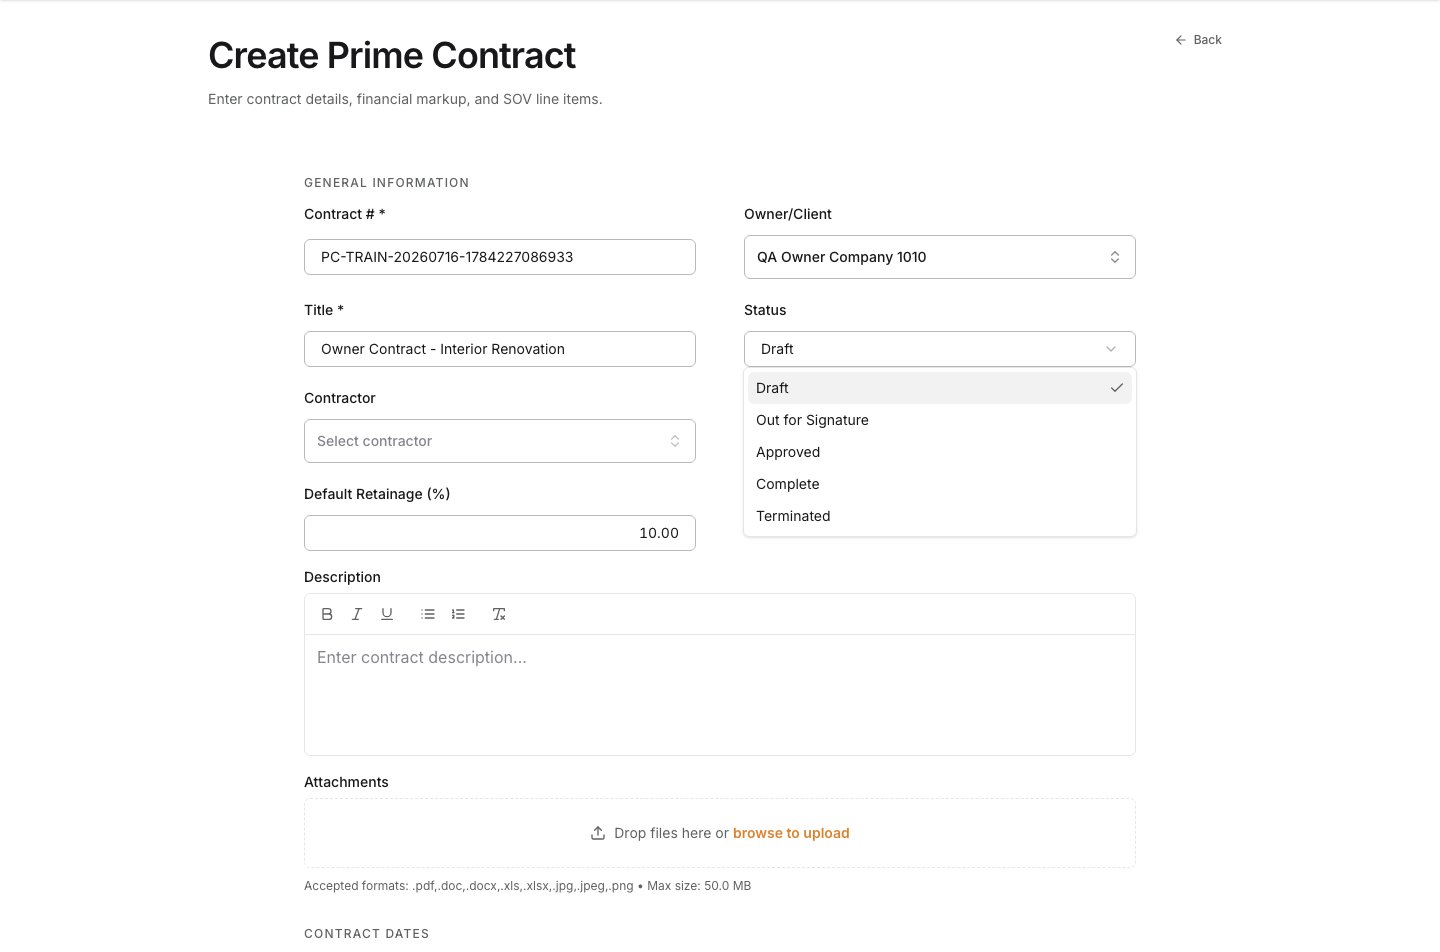
5
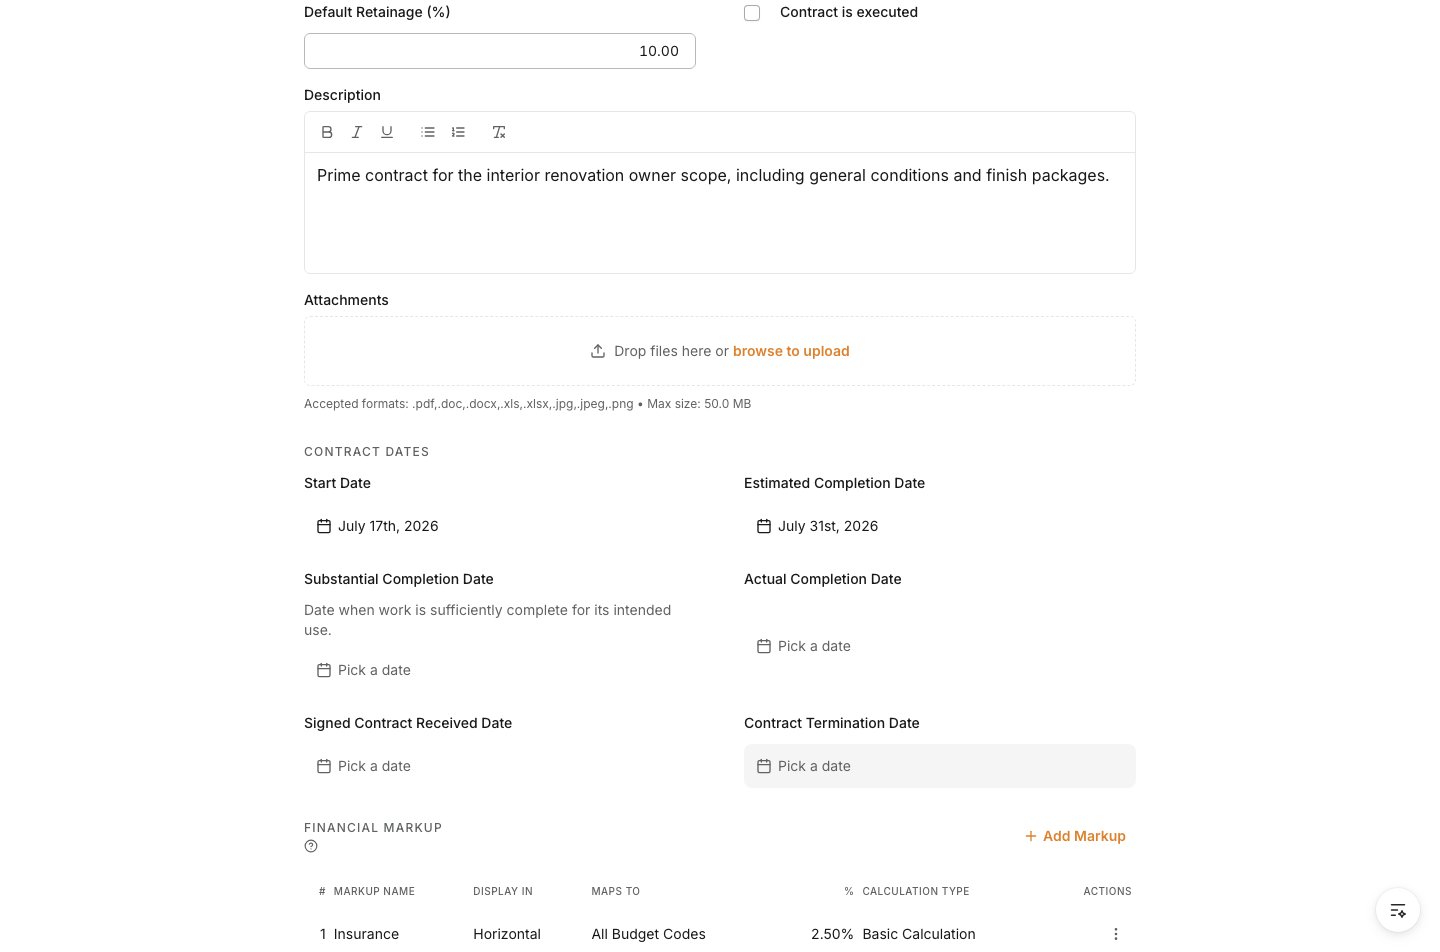
Complete the remaining fields
Add a concise Description so the project team understands the owner-facing purpose and scope. Upload supporting documents if needed.
6
Update the relevant dates.
7
Clarify included and excluded scope
Record Inclusions and Exclusions whenever the agreement needs explicit boundaries. This prevents scope assumptions from being confused with contracted work when invoices or changes are reviewed later.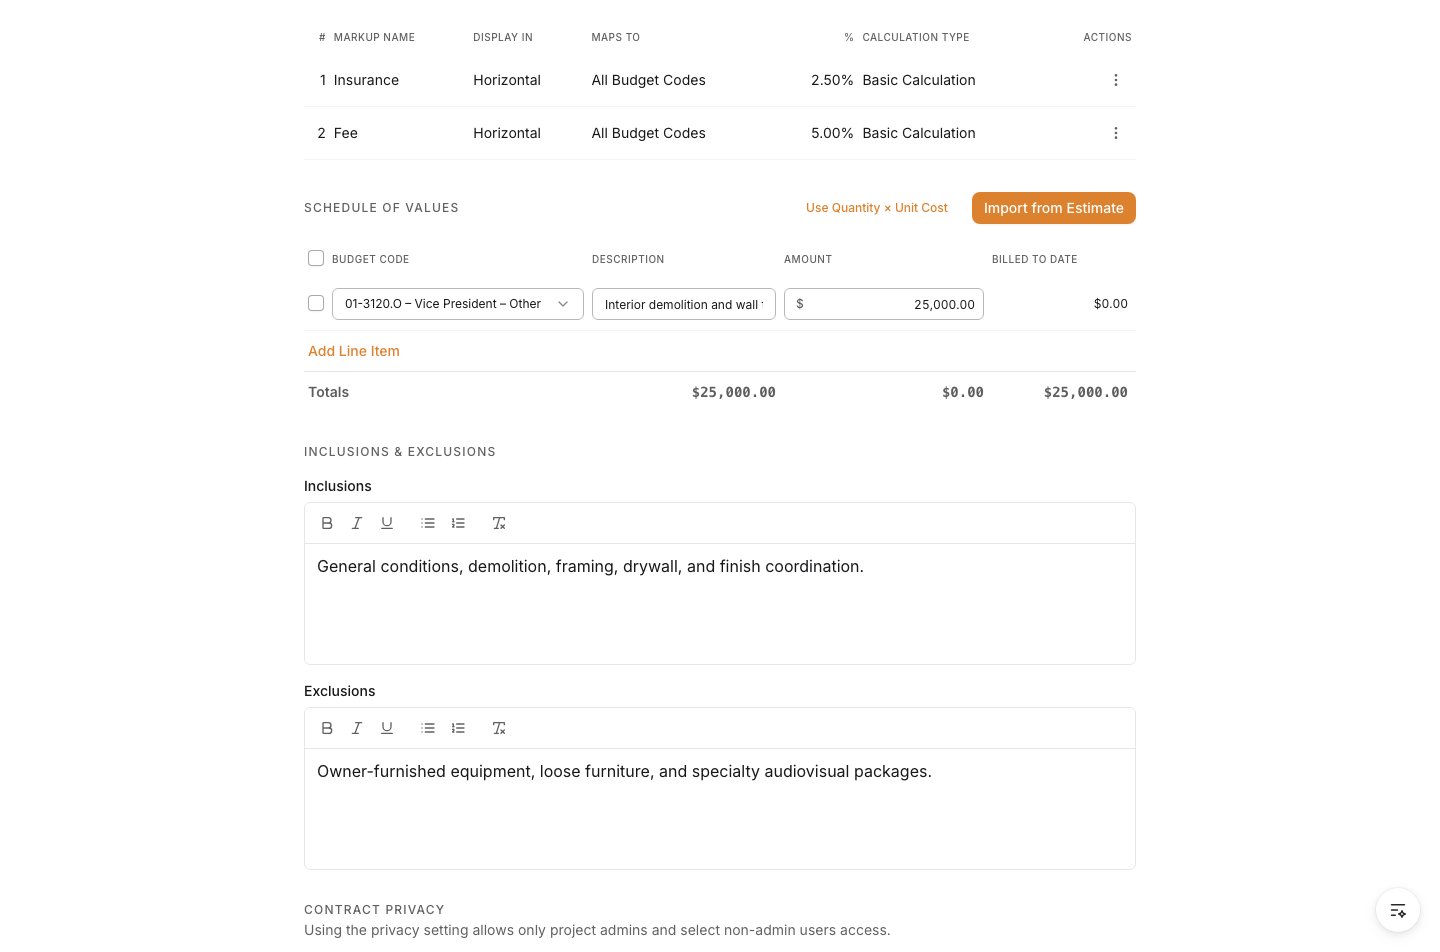
8
Apply privacy rules
Turn on Private when only project admins and specifically selected non-admin users should access the contract. Leave it off when the project team’s normal access model is appropriate.When the contract is private, select the permitted project users in Access for Non-Admin Users. Select Allow these non-admin users to view the SOV items only for users who also need the contract’s line-item values.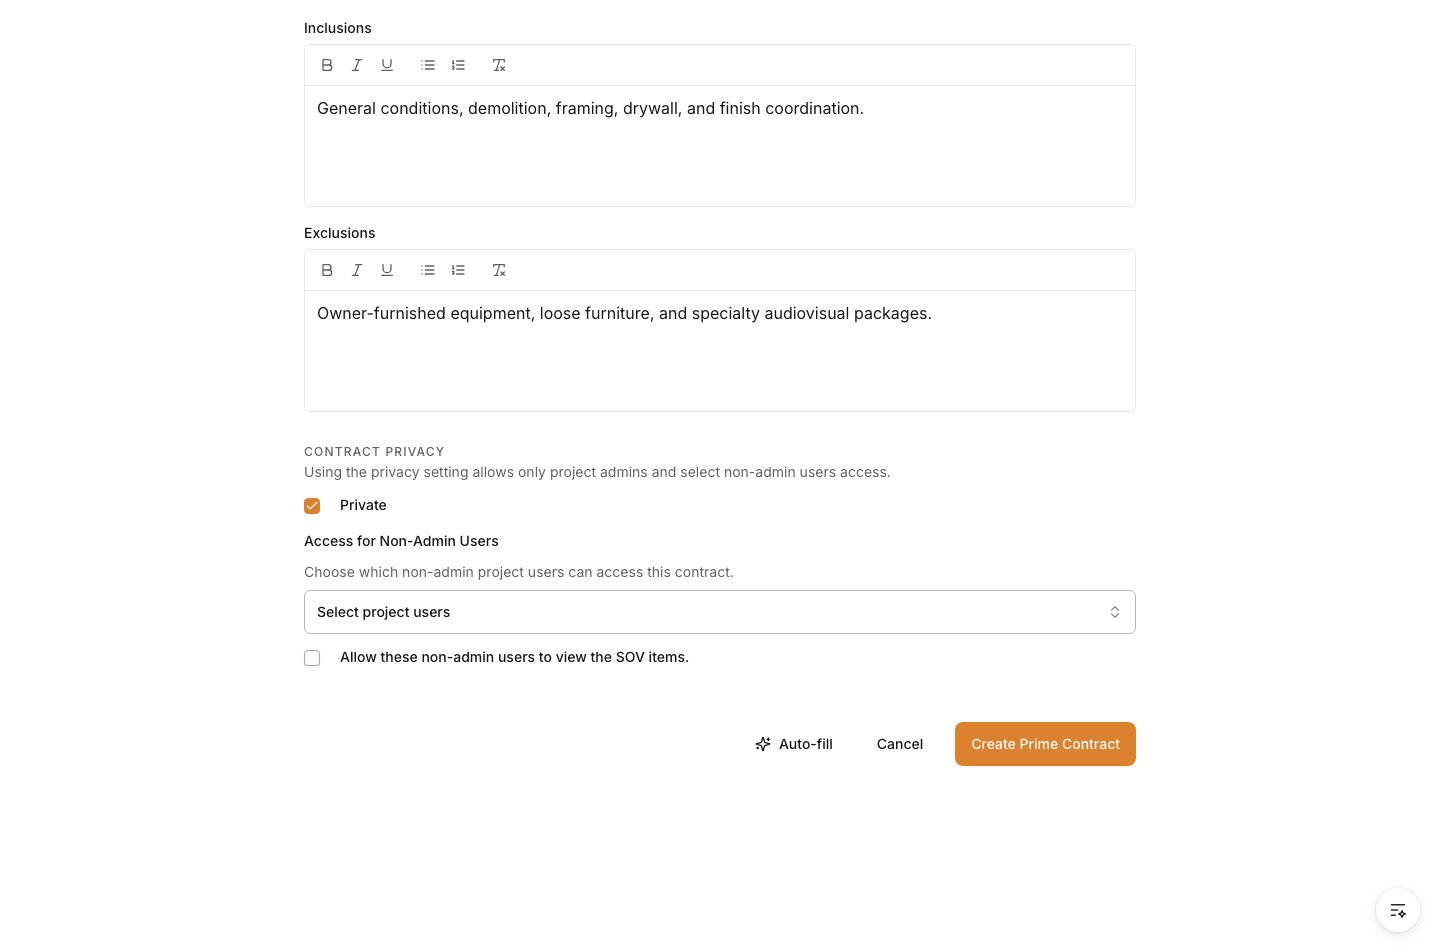
9
Create and verify the agreement
Select Create Prime Contract. The saved agreement opens on its detail page. Confirm the contract identity, owner/client, status, dates, SOV total, scope notes, and privacy setting before it enters approval or invoicing.